PBA Mode: Server Setup
1. Download PBA 1.1.0
2. Unzip Personal-Backup-Appliance-1.1.0-vm.zip
3. Open the .vmx file using VMware Player or VMware Server.
After the VM boots up, you'll see a screen like this:
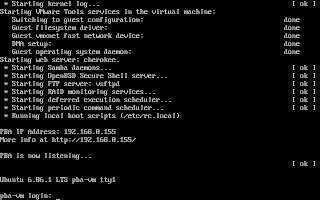 Please take note of the PBA's IP Address and the URL that's displayed. You'll need to use it later. Login. The login is vmware. The password is vmware.
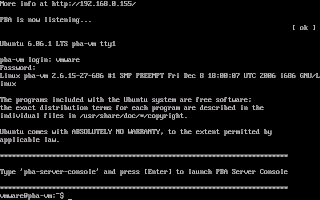 IMPORTANT: The first thing you should do after booting up is update to 1.1.0-1 using the patch. 1.1.0-1 fixes a bug in Local Mode. To patch to 1.1.0-1, run these commands on the PBA VM. This is a temporary requirement in lieu of the next release.
When the patch process is finished, you'll see a screen like this:# cd /home/vmware
# wget http://downloads.sourceforge.net/pba-vm/pba-patch_to_1.1.0-1.zip
# unzip pba-patch_to_1.1.0-1.zip
# sh pba-patch_to_1.1.0-1.sh
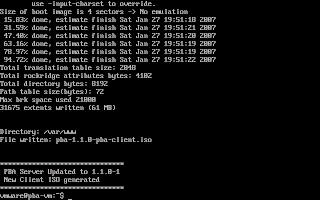 Your PBA Server is all setup and ready to go. The next time you use it, all you need to do is power it on.
PBA Server Console
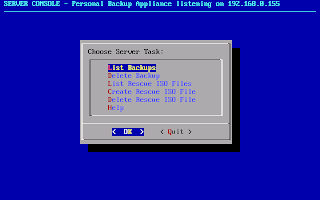
Version 1.1.0 has a new feature called the PBA Server Console which is started using the 'pba-server-console' command. The PBA Server Console is a management interface for deleting Backups and Creating a Rescue ISO file that you can burn onto a CD or DVD.
 PBA Mode: Client Setup
Client Download
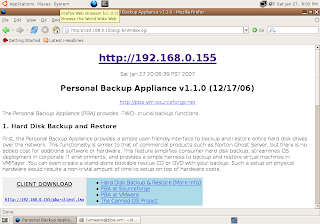
First, download the PBA Client ISO from your PBA Server. Go to your PBA's web page using your PBA's URL. On this web page, you'll find instructions on how to download the PBA Client ISO and burn it onto CD.
Here's what the web page will look like. See the download link for the Client ISO image. Download the ISO image and burn it onto a CD.
 Running the PBA Client
Once you have the client CD, boot it on a computer or VM on your network that you would like to backup. To boot from CD, you may need to change the boot order in your BIOS to boot from cdrom before the hard disk. After the client CD boots, you will be greeted with a prompt asking for the IP address of your Personal Backup Appliance.
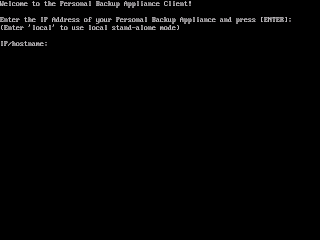 Enter in the IP address of your PBA Server, then press [Enter].
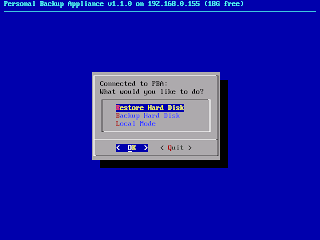 PBA Mode: Backup Hard Disk
Use the arrow keys to select "Backup Hard Disk" and then press [Enter]. You'll see a prompt that looks like this. Type in a Backup Filename and press [Enter].
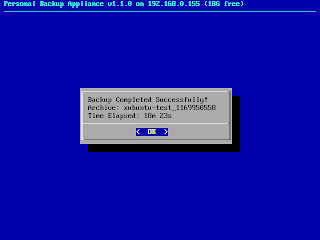
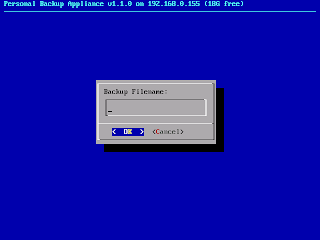 The script will then chug along and backup your hard disk over the network to the PBA Server. The script will backup the MBR, the partition table, and sequentially backup each partition using partimage, ntfsclone, or dd. When the backup finishes, you'll get a screen that looks like this.
 PBA Mode: Restore Hard Disk
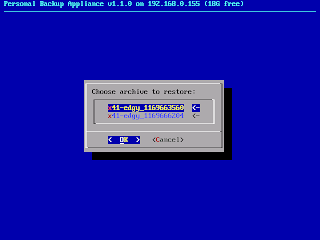
To restore a backup, just boot from the PBA Client CD, and select 'Restore Hard Disk' from the main menu. You'll see a menu of backup archives to restore. Use the arrow keys to choose the backup archive, and then press [Enter] to start the restore.
 The script will restore the MBR, the partition table, and sequentially restore each partition using partimage, ntfsclone, or dd. When the restore finishes, you'll get a screen that looks like this.
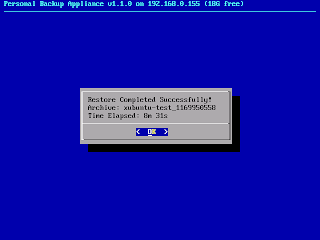 Select Quit and power off the system when you're done.
Discuss PBA, Get Help, and Share Ideas on the Discussion Forums
Did you Digg this article?
13 comments:
It is possible to schedule a backup of a phisical machine?
I'm trying to run a client (the slax version due to SATA hdd), but it keeps hanging when trying to scan for PnP cards. It reads:
isapnp: Scanning for PnP cards...
My computer does not have any ISA slots, only PCIs, which are not populated.
Can you shed some light?
this looks so promising but it seems that I cannot boot properly from the boot cd created from the .iso. I even burned At boot it complains that it can't find the INSERT filesystem and drops me to a "very limited shell".
I get the same error as above "INSERT File system not found"
I tested the client cd on my dell laptop and it booted fine. I am guessing some issue may exist with the hardware on my inspiron 531s that is not letting INSERT boot correctly. I am leaning toward it being because the Hard drive and DVD/CDROM are sata maybe? It's either that or some USB issue because when it breaks out into the limited shell I can't type anything via my usb keyboard. The keyboard works in the bios and in windows though.
I've since been able to use the disk without problems on other systems. In this case I think it was an unsupported raid card since the problem machine was an old server.
I resolved the INSERT OS error by upgrading the INSERT OS to the latest release and recreating the client ISO. After doing so it works like a champ. I am more leaning to this being due to the delivered version of INSERT not being compatible with SATA hard drives.
I was wondering if I could use this to backup to a remote location in a secure way. I'm afraid that the connection between the client and server is not encrypted. Can anyone let me know?
When trying to restore a backup I connect to PBA and the restore starts but I get an Error 22.
What is Error 22?
Oops, I had my previous post the wrong way around. Error 22 occured when trying to backup to the PBA server.
When the backup started I got the Error 22 message.
Steven, i have the same "INSERT Filesystem" error, could you share with us how to upgrade the INSERT OS or give instructions to us on the upgrade process.
The "Can't find the INSERT filesystem" error seems to be due to SATA CD/DVD drives. I have backed up numerous systems with SATA hard drives, but have only run into this with a system with a SATA DVD drive that was used to boot off the CD. Makes sense with the error, as the INSERT filesystem would be on the CD not the Hard Disks.
Steven, if you could share the steps you used to upgrade the ISO to a newer INSERT release, that would be very helpful. Then maybe we can get the PBA release updated to include that new ISO image!
This is a good common sense article. Very helpful to one who is just finding the resources about this part. It will certainly help educate me.
Post a Comment