Hard Disk Backup and Restore Walk-through using the Personal Backup Appliance
[
There's a newer version of this guide ]
Download PBA at:
http://pba-vm.sourceforge.net
Discuss PBA, Get Help, and Share Ideas on the Discussion ForumsThis is a guide to using the Personal Backup Appliance to backup and restore your hard disk. The Personal Backup Appliance is an open source alternative to Ghost server. The Personal Backup Appliance, or PBA for short, is distributed as a VMware Virtual Appliance. To get started, go to the link above, download the latest release, unzip it, and power it on using VMware Player, a free download from
http://www.vmware.com/download/player/When you first power on the VM, Ubuntu Linux will boot up and automatically launch Firefox with the main information page.
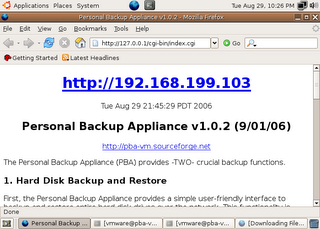
At this point, everything is setup and ready to go on the server-end. The next step is to set things up on the client-end. Please take note of the IP address that's displayed on your VM. It will most likely differ from the IP address in the screenshot. Please also take note of your VM's url.
From another system on the network, go to the PBA VM's web page, download the PBA client CD iso image from the VM, and burn it onto a CD.
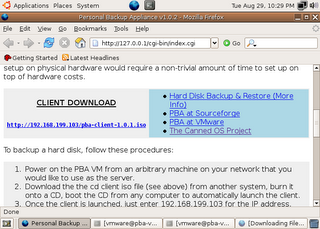
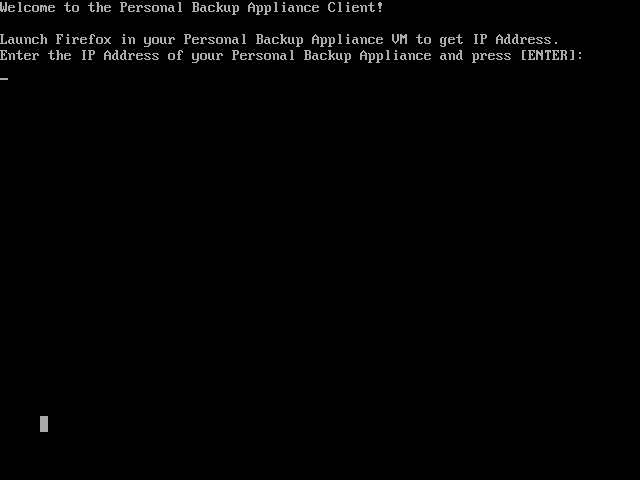
Once you have the client CD, boot it on a computer or VM on your network. To boot from CD, you may need to change the boot order in your BIOS to boot from cdrom before the hard disk. After the client CD boots, you will be greeted with a prompt asking for the IP address of your Personal Backup Appliance.

Type the IP address and press [ENTER].
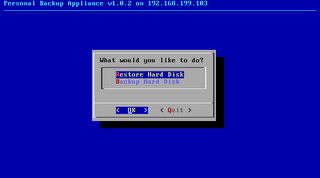
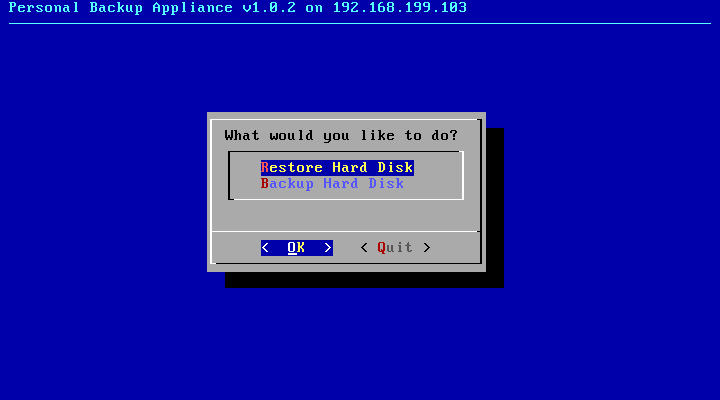
Next, you will presented with a simple menu. Use the arrow keys to navigate and Press Enter to select. Select Backup.
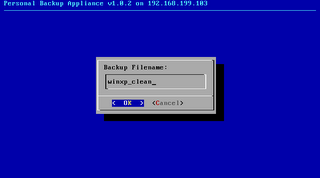
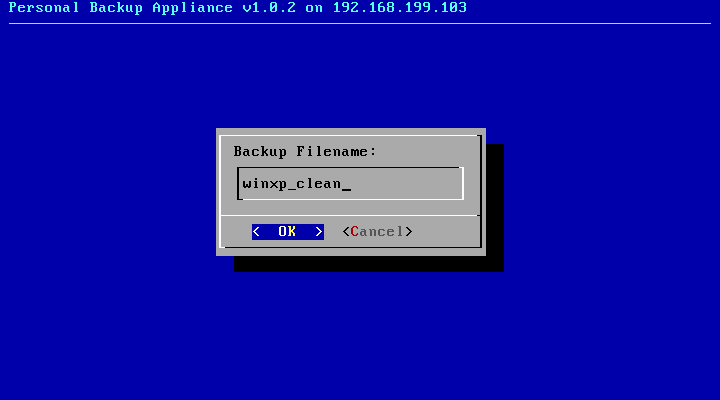
At the Backup Filename: prompt, enter in a POSIX compliant filename. If it isn't compliant, just try again.
When backing up, you will either see a partition image, ntfsclone, or dd progress screen.
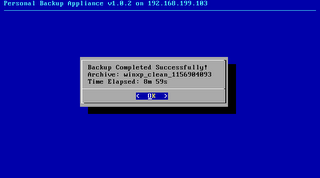
When the Backup operation is complete, you will see this screen.
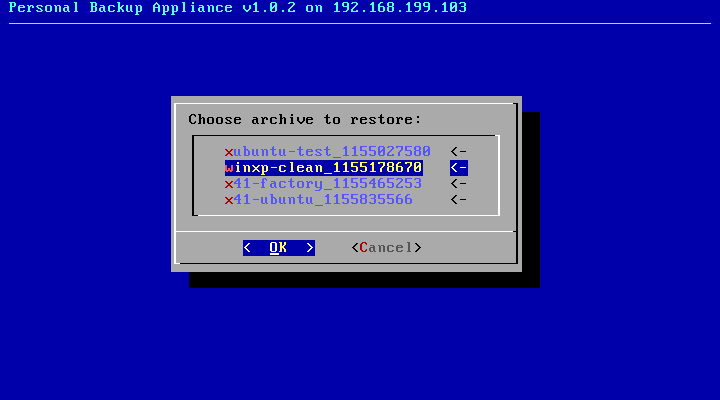
If you select the Restore option from the main menu, you will be presented with a menu to choose the archive that you want to restore.

Choose the archive that you want to restore.
During the restore operation, you will see either see a partition image, ntfsclone, or dd progress screen.
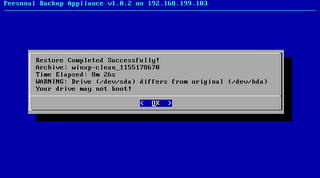
When the Restore operation is completed, you will see this screen.
Select Quit and power off the system.